123FormBuilder Knowledge Base
Search our documentation platform for answers, service specifications and 3rd-party integrations.
How to set up Gmail SMTP with 2-Step Verification On Your Forms
To configure your SMTP email server with Gmail, you need to enable 2-step Verification on your Google account and use an app password instead of your Google account’s normal password.
An app password is a 16-digit code that allows an external app or device to access your Google Account. We recommend turning 2-step Verification On because Google is constantly restricting access to non-Google products.
How to set up SMTP with 2-Step Verification On
Follow the steps below to learn how to send emails through your Gmail SMTP server with 123FormBuilder:
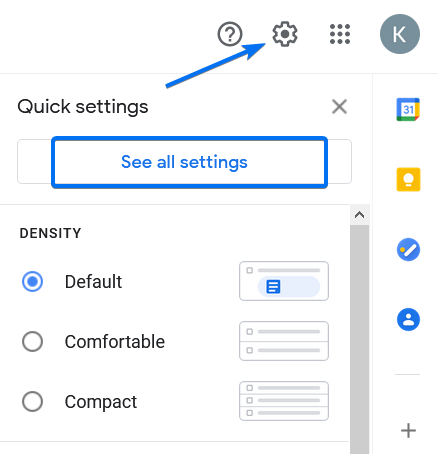
1. Open your Gmail account and head over to the gear icon to access its settings.
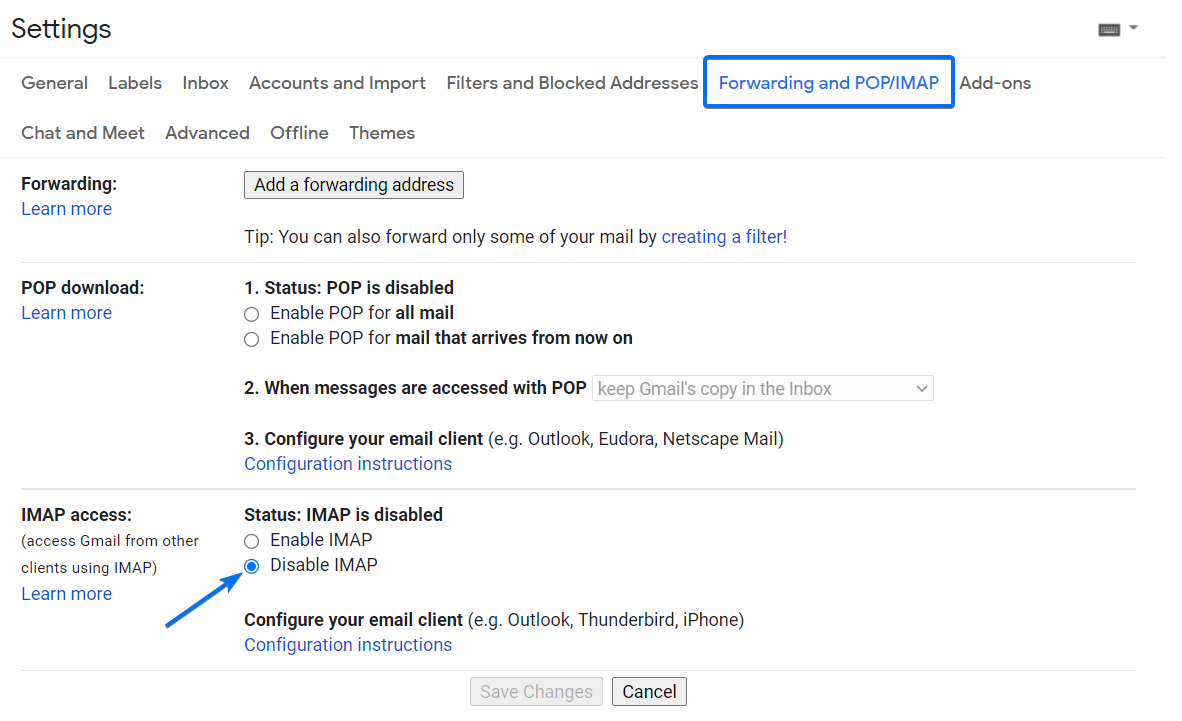
2. At Forwarding and POP/IMAP look for the option called IMAP access and disable it.
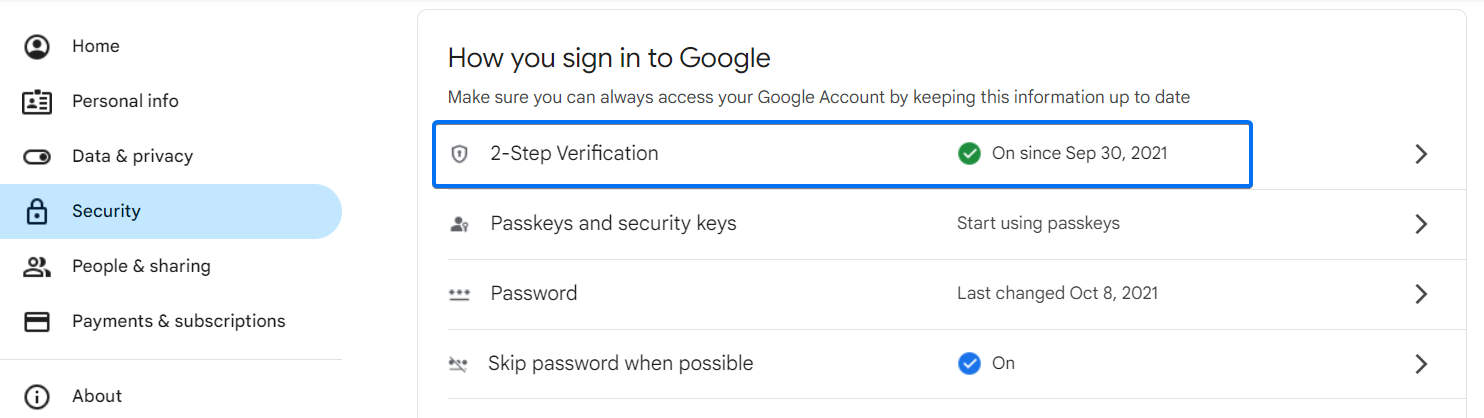
3. Next, click on your account’s icon and select Manage your Google Account.

4. Open the Security section and select 2-Step Verification.
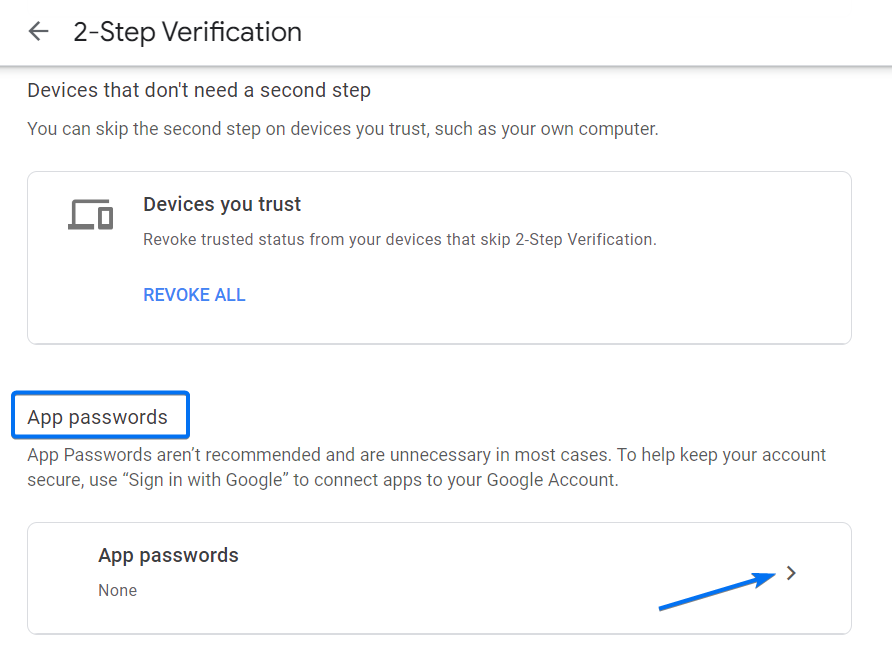
5. Scroll to the bottom of the page where you will find App passwords and select it to move forward.
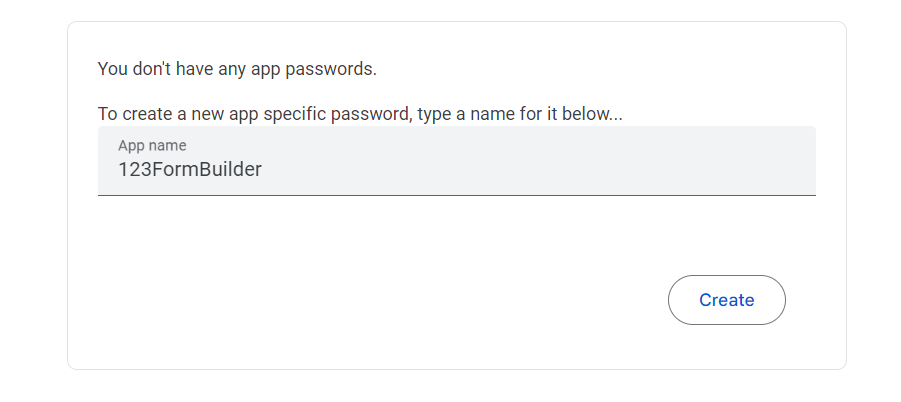
6. Now it’s time to type in a name for your password and press Create. The name can be 123FormBuilder. This way you know that the password is related to your 123FormBuilder forms.
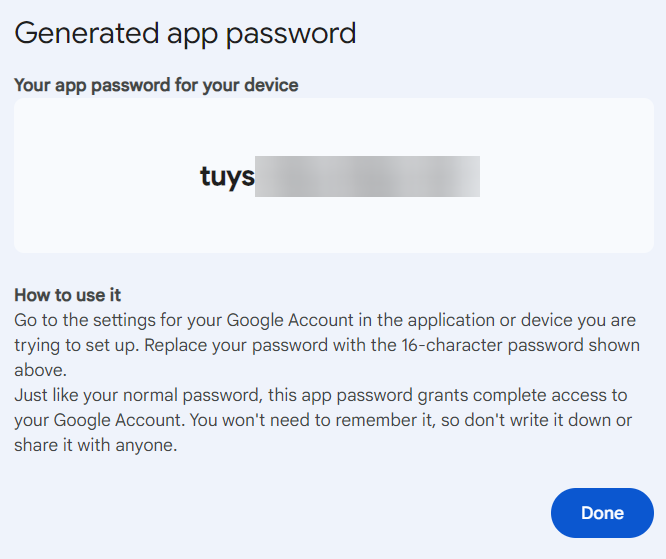
7. You will receive a 16-digit code. Copy and save the password.
Important Note
Once you click on Done, the password can no longer be retrieved. If you will need to re-use the password later for a different form, make sure you are copying and saving it somewhere safe before clicking on Done. However, you can generate a new password at any given time and your old password will still work on the forms where you enabled SMTP with it.8. Now that you have the password, head over to your 123FormBuilder account and open the SMTP configuration window.
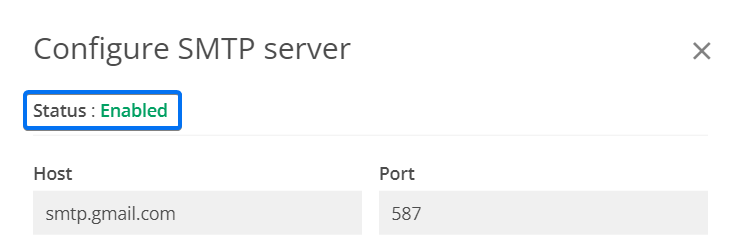
9. Insert your SMTP server details. Where it asks you to enter the Password, paste the app password copied earlier.
Use the following settings:
- Host: smtp.gmail.com
- Port: 587
- Username and Email: your Gmail email address
- Protocol: TLS or Auto
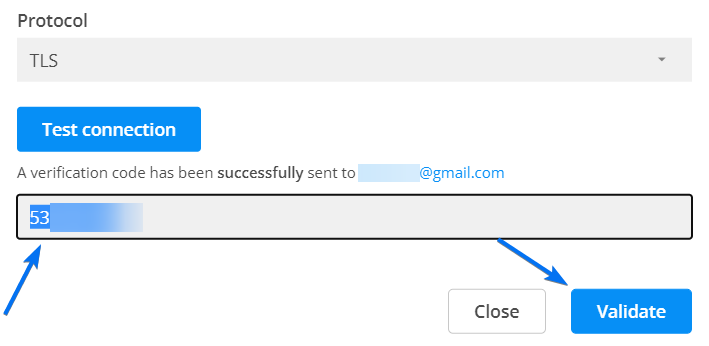
10. Click Test connection and open your Gmail inbox.
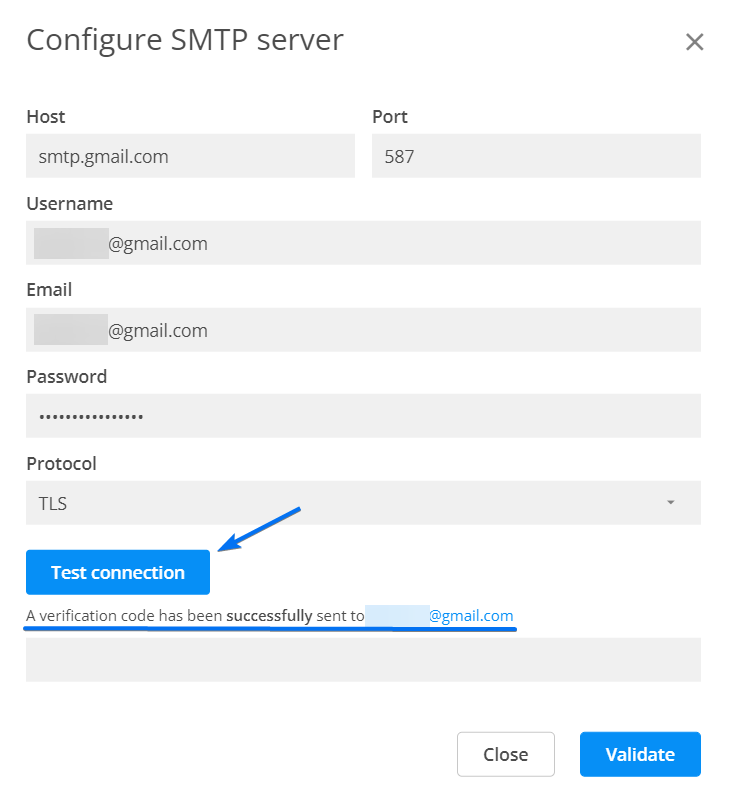
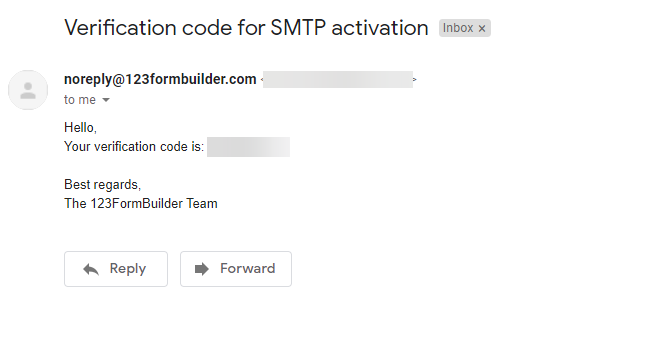
11. A verification code is sent by 123FormBuilder. Copy your verification code. If the email isn’t there, you might have to whitelist and mark us as a trusted sender.
12. Back to your SMTP settings, place this verification code, and hit Validate.
13. Close and open again the window to check the SMTP Status.
14. Make a test submission.
From now on, all email notifications for your 123FormBuilder forms will be sent through your SMTP server.
2 comments
Leave a Reply
Similar Articles
Frequently Asked Questions
Here is a list of the most frequently asked questions. For more FAQs, please browse through the FAQs page.
THANK YOUUU. I have problem with SMTP Authentication and this solve it.
Hello! We appreciate your feedback.
Have a wonderful day!