123FormBuilder Knowledge Base
Search our documentation platform for answers, service specifications and 3rd-party integrations.
123FormBuilder and PayFast Integration
PayFast is a payment processor for South Africa, therefore it will accept payments only in South African Rands.
Setting up your PayFast integration
1. Click New Form from your account dashboard and start creating your payment form.
You can use choice fields (single/multiple choice and dropdown lists) to display the products on sale or, even better, Product field.
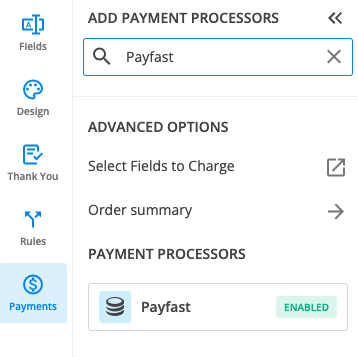
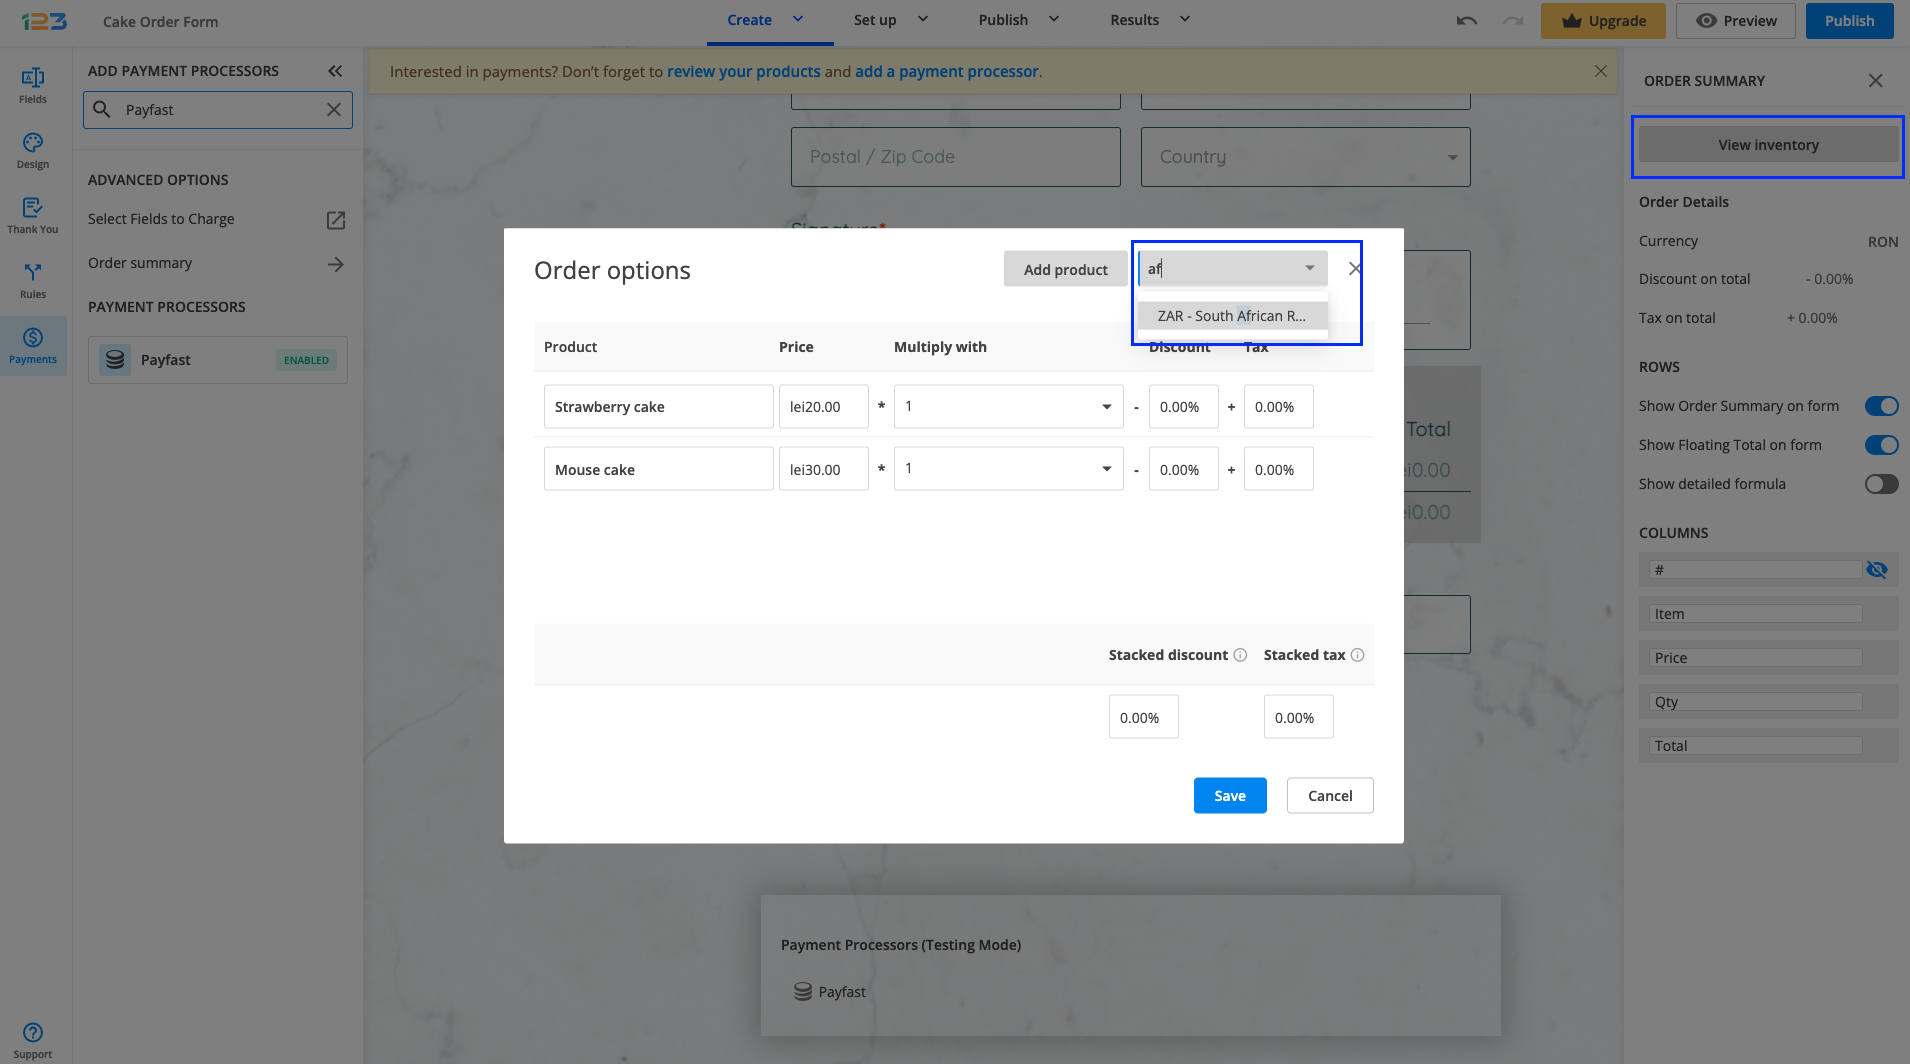
2. In your Form Editor, in the left side panel, you will notice the Payments section. By using the search bar, you can quickly find Payfast.

3. After adding PayFast on your form, you will notice a couple of changes: the PayFast payment processor has a tag near its name & the settings panel opens up to the right side of the page.
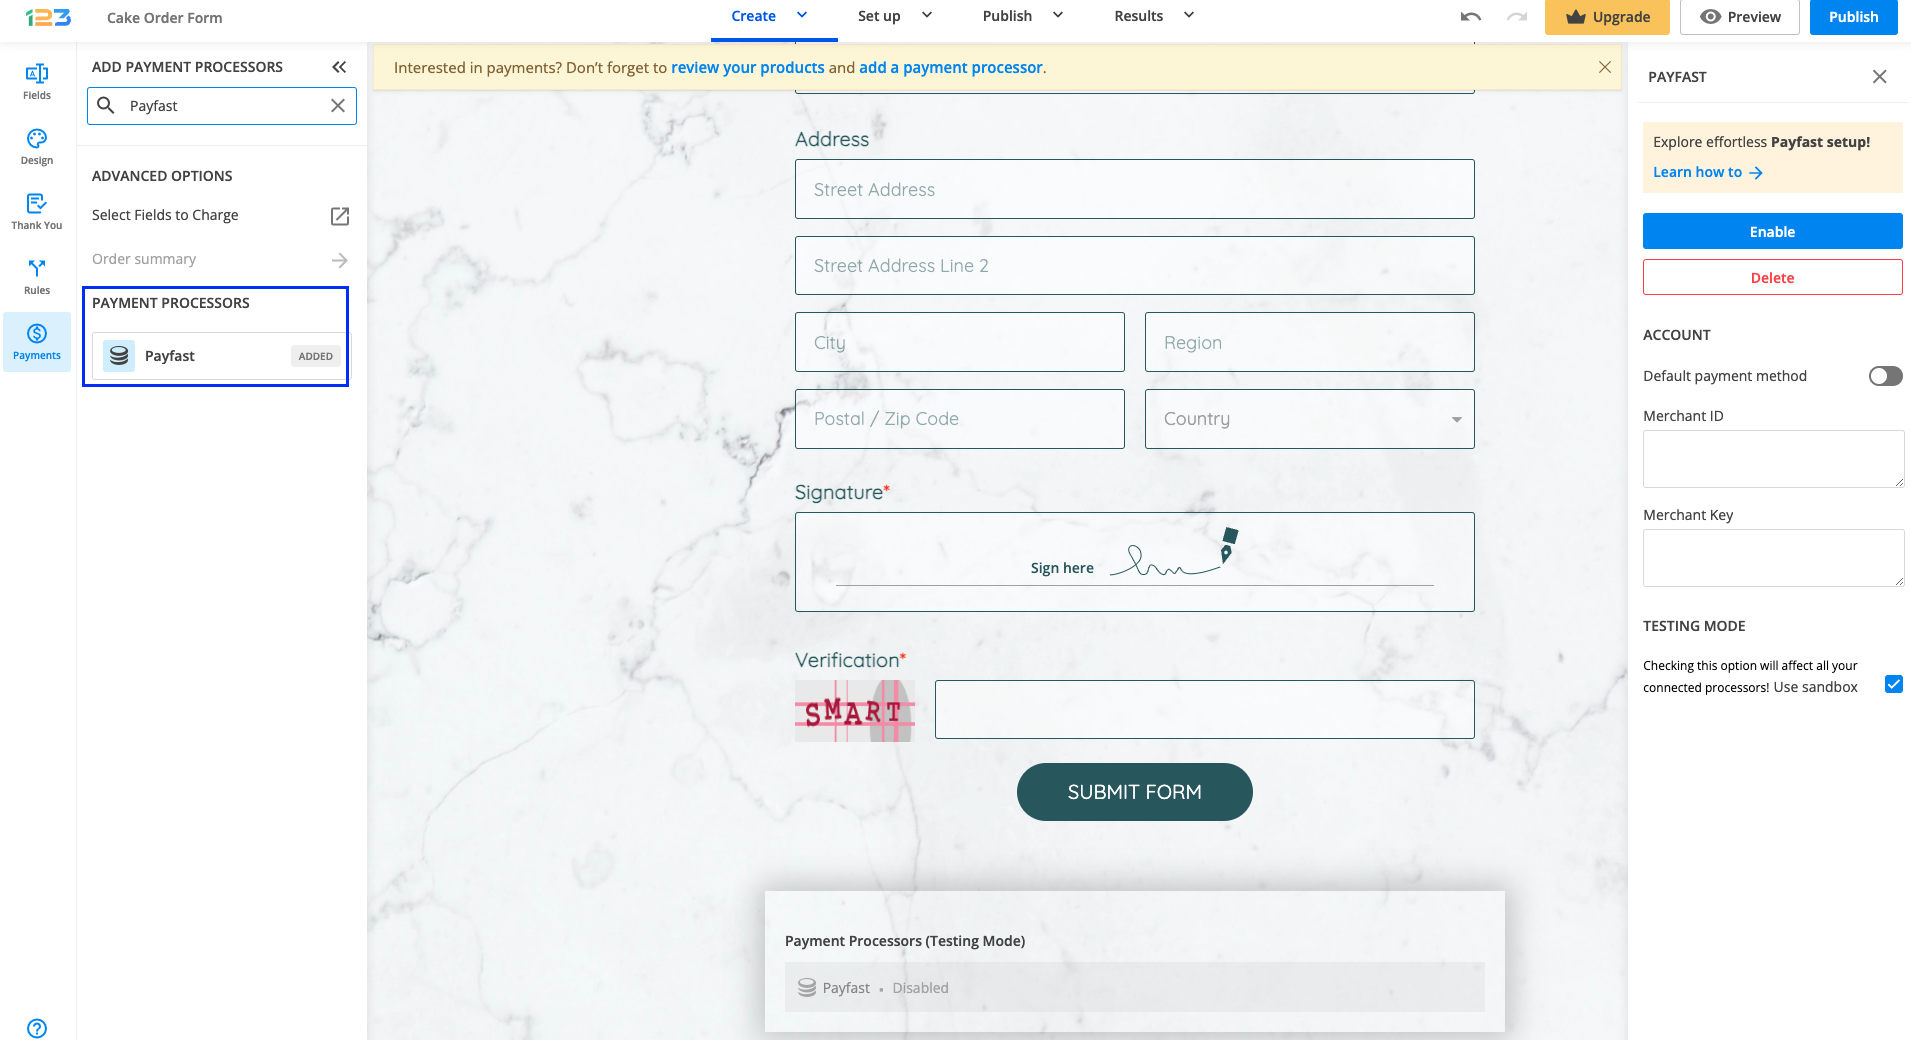
4. In order to set up Payfast integration, you have to provide your Merchant ID and Merchant Key.
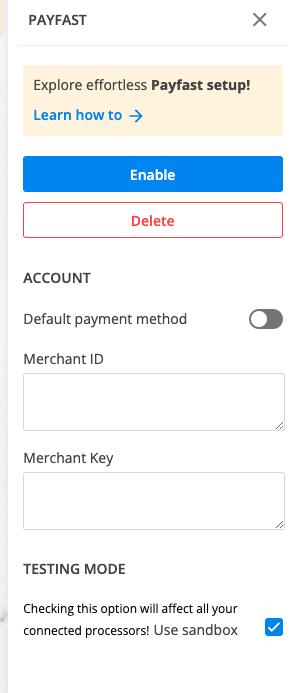
If you don’t want to make a real payment, but just want to test the integration, different settings should be made in your 123FormBuilder account:
a. Enable your integration with the following information:
Merchant ID: 10000103
Merchant Key: 479f49451e829
b. Tick Use sandbox
Then, once redirected to PayFast, you need to log in under Returning buyer with the following data:
Username: sbtu01@payfast.co.za
Password: clientpass
5. Enable the payment integration by clicking on Enable button. By enabling Payfast, you will notice a couple of changes on your form.
The Payfast payment processor on the left side panel has an Enabled tag on it so you could easily scan which payment processor is enabled.
Another change is that on your form it will be displayed an Order summary. Here will appear all the products your respondents select on the form, together with the price per option, quantity and the total price. If you want to customize the order summary, all you have to do is click on it and the available settings appear on the right side panel.
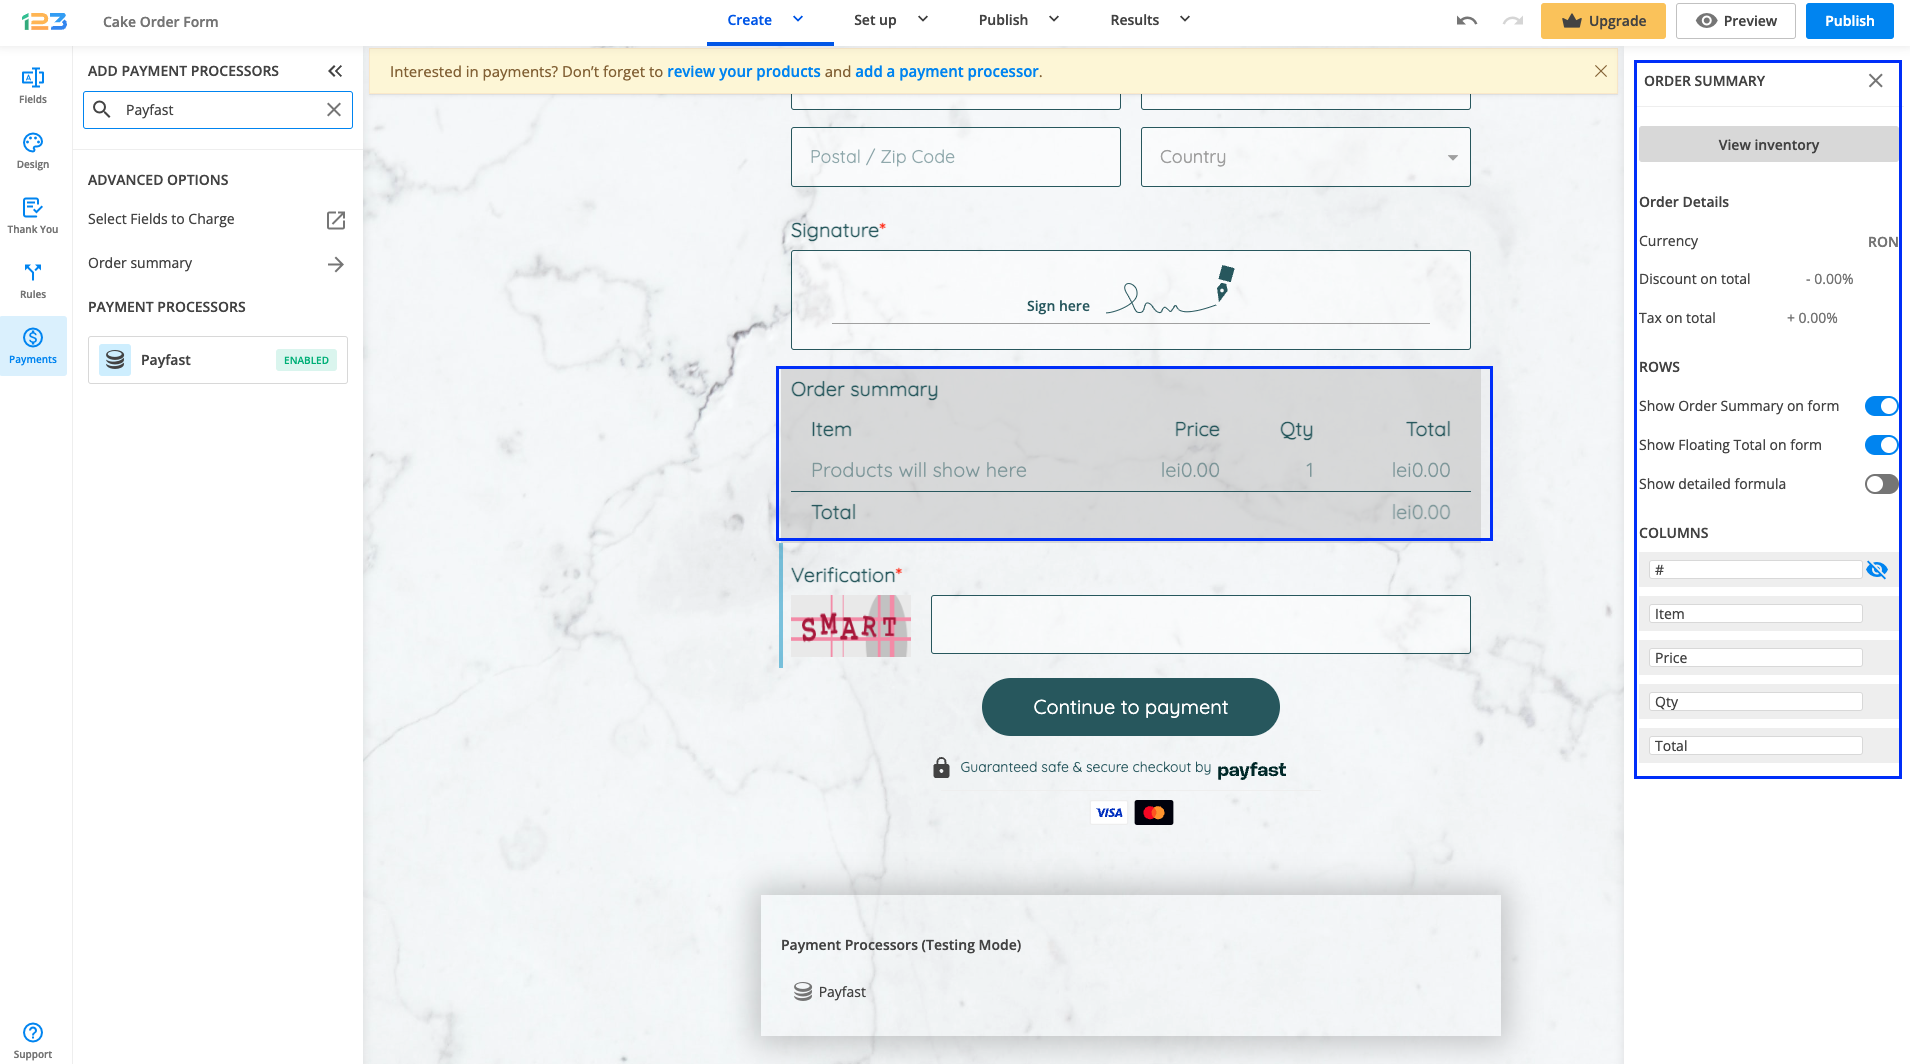
Note: You need to set the Currency to South African Rand. To do so, click on View inventory and from the second dropdown, select the appropriate currency.
Another change is related to the Submit button. Once your payment integration is enabled, the Submit button is changed to Continue to payment. Below it, we are displaying a disclaimer together with the Payfast logo so that respondents are aware they are proceeding to a payment.
Also, the accepted cards by the Payfast integration are visually displayed so that respondents know from the start what is the accepted payment method.
You can customize the action bar (everything that is related to the submit button, additional buttons, disclaimer, etc) by simply clicking on this area.
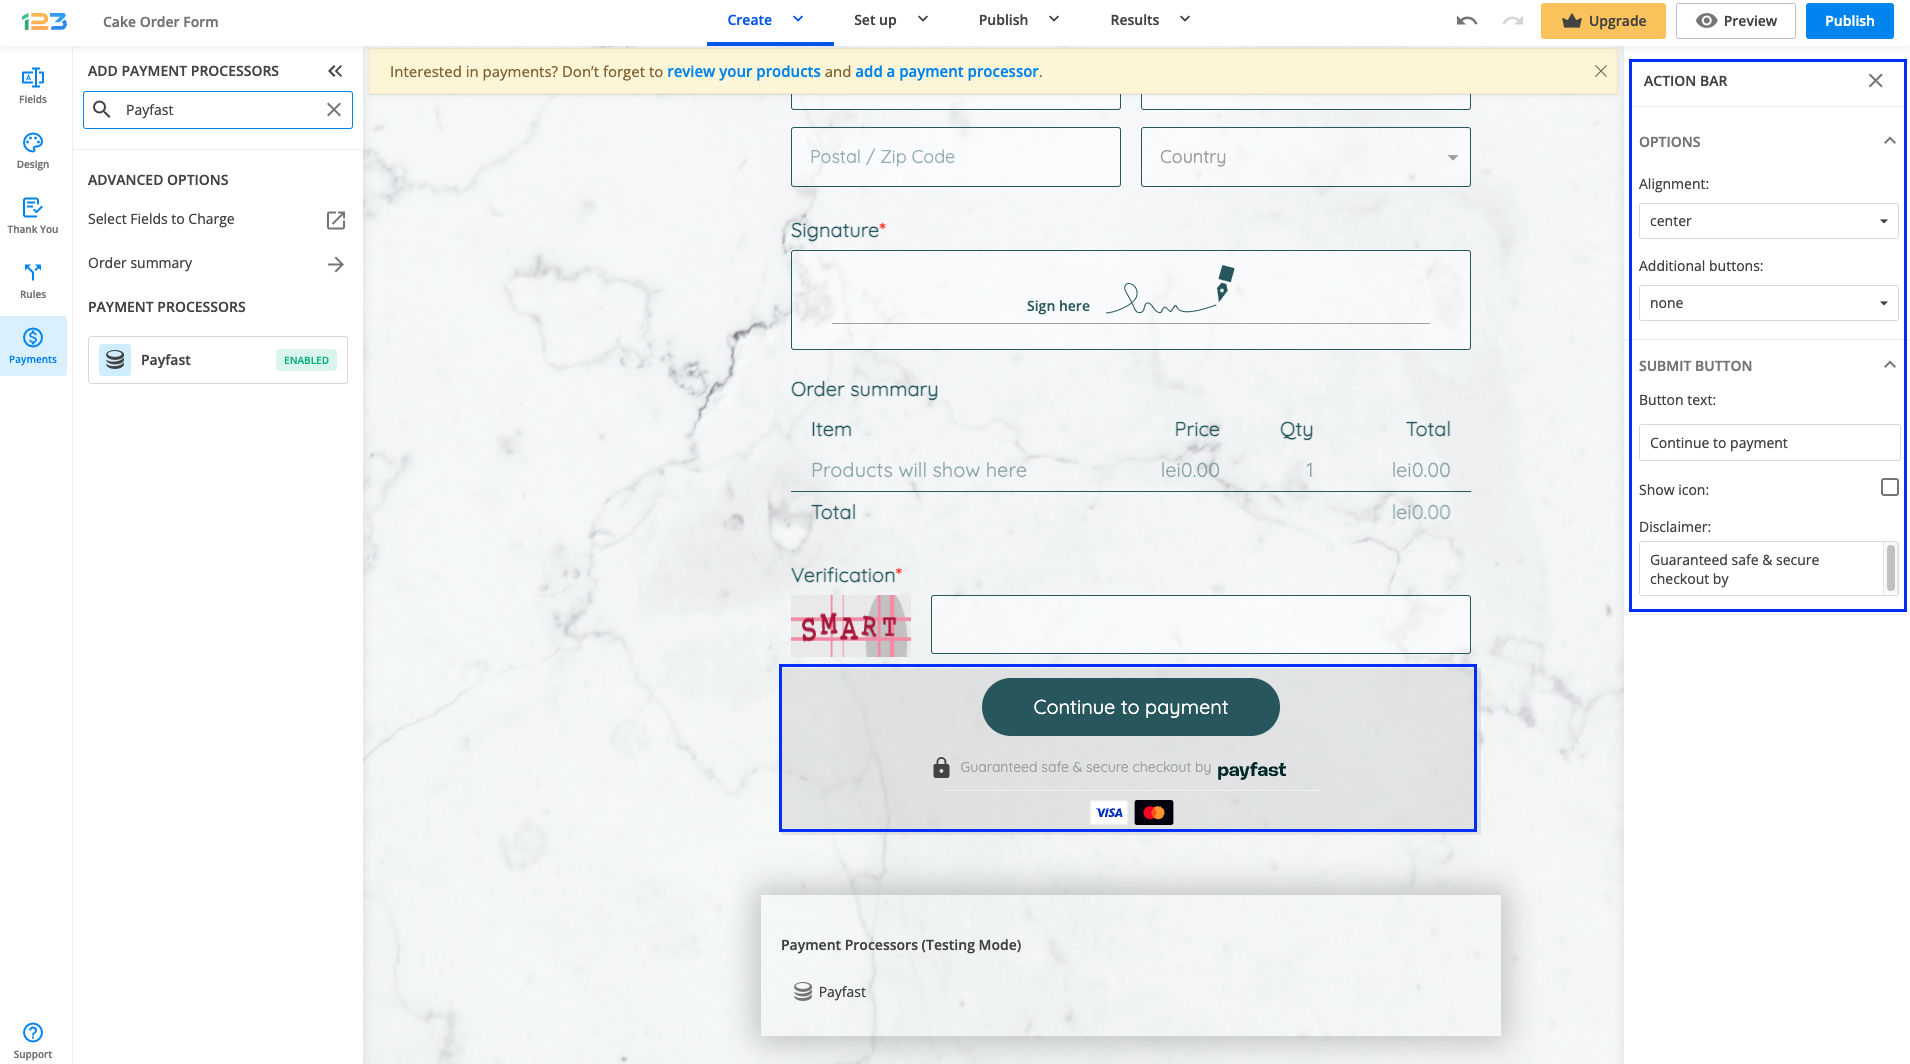
Under the Continue to payment button, we are displaying a disclaimer text, together with the logo & icon of the payment processor and the accepted cards. You can disable these settings by clicking on the payment processor and going to Display payment info.
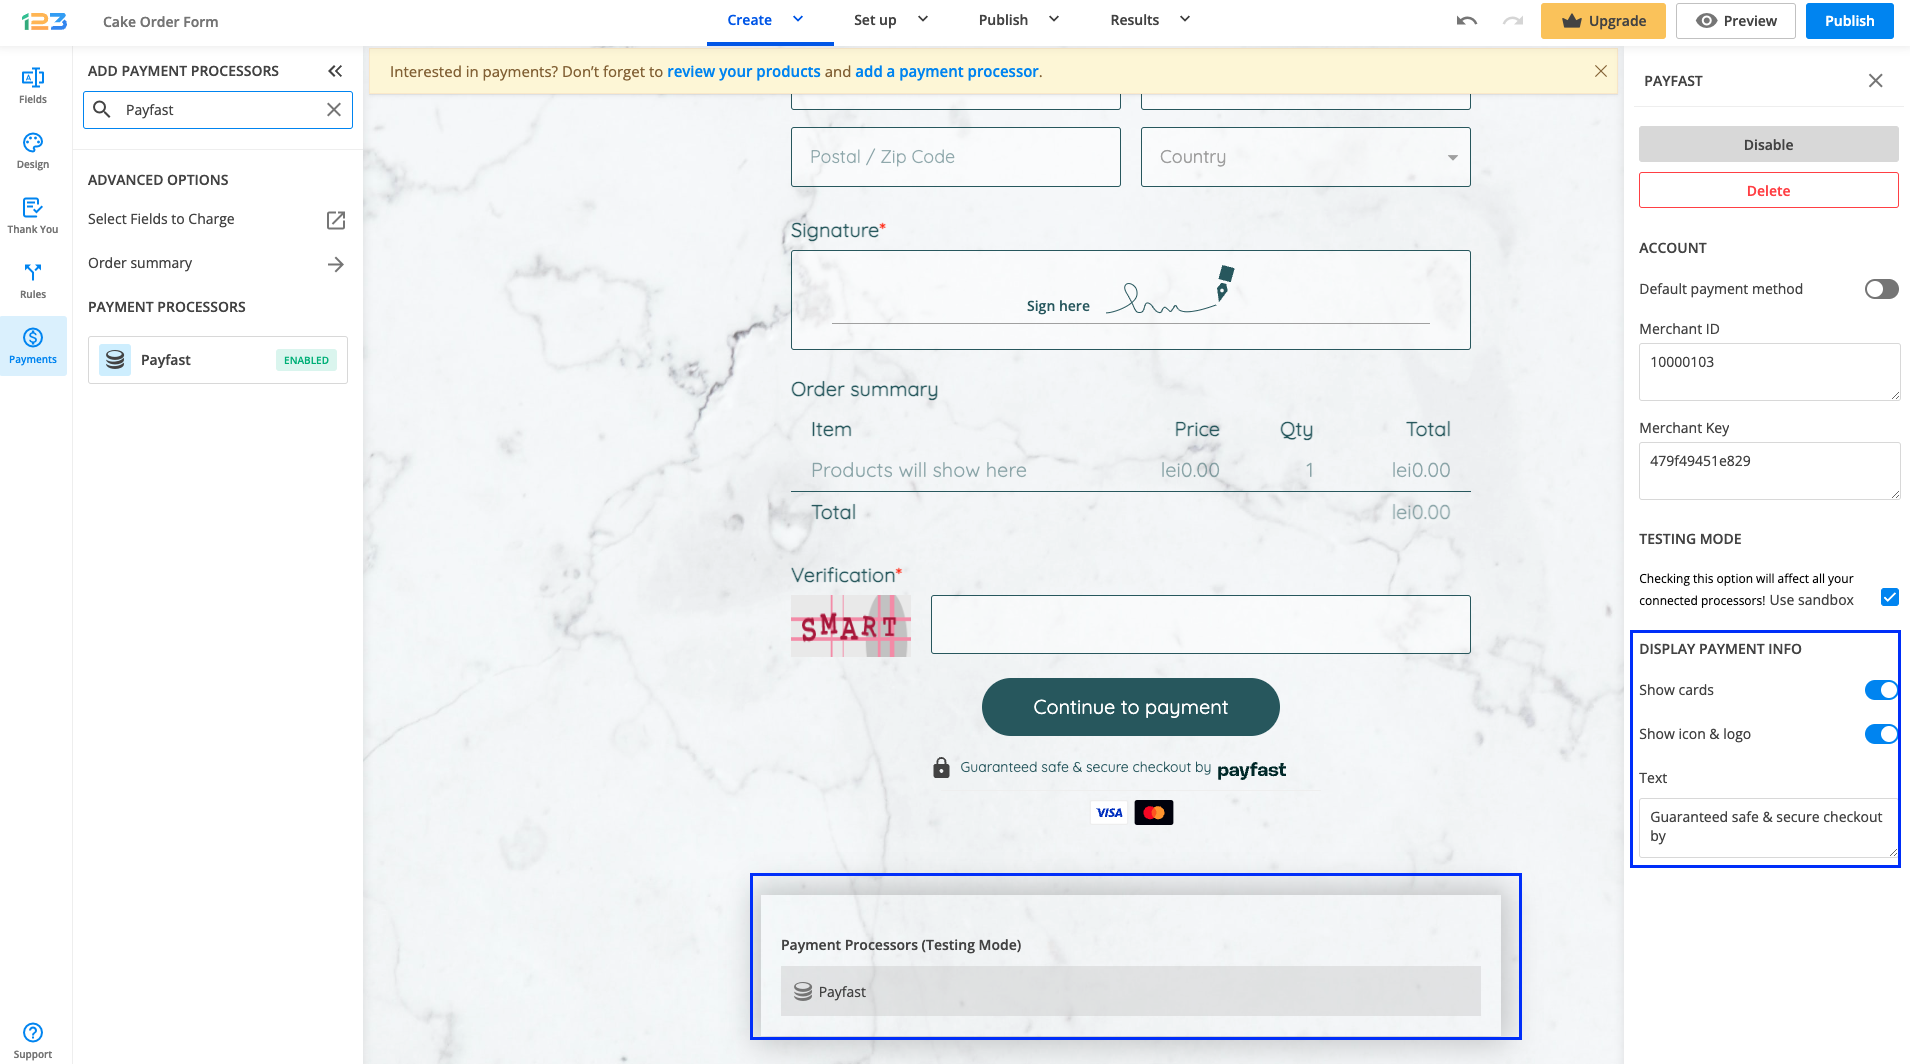
In order to get the settings information from your PayFast account, you have to log in to your PayFast account and go to Settings. There, under Merchant identifiers, you can find your Merchant ID and Merchant Key.
Similar Articles
Frequently Asked Questions
Here is a list of the most frequently asked questions. For more FAQs, please browse through the FAQs page.